How to Master the One Arm Elbow Lever (Crocodile Guide)
Unlock the One Arm Elbow Lever. Our guide breaks down the technique to master this foundational arm balance.
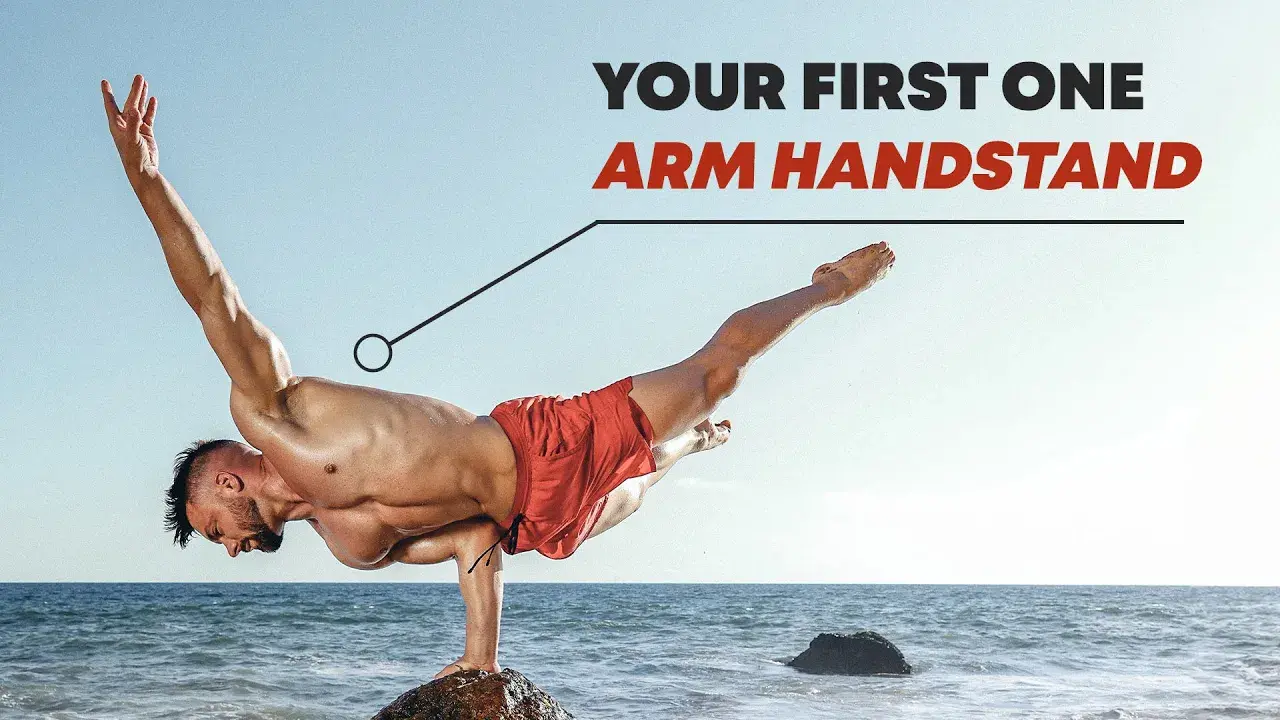
The One Arm Elbow Lever is the first One Arm Handstand that you will learn and a great party trick.
TABLE OF CONTENTS
1. Deconstructing the One Arm Elbow Lever
1.1. What is the One Arm Elbow Lever?
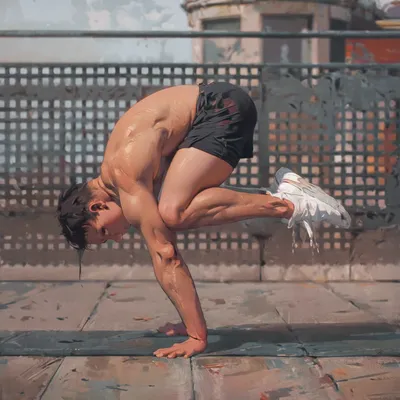
The One Arm Elbow Lever, often called the Crocodile in performance circles, is one of the most accessible yet impressive feats of Hand Balance you can master. It's frequently touted as the first one-arm balance an athlete learns, and for good reason. The goal is to suspend your body parallel to the floor, supported by a single bent arm, with your elbow pressed firmly into your core near the belly button. Unlike a towering One Arm Handstand where the primary balancing joint is the shoulder, the Crocodile keeps your Center of Mass low and wide. This creates a much larger Base of Support, drastically reducing the difficulty and making it a perfect gateway into the world of high-level Calisthenics. You're not balancing a pencil on its tip; you're stabilizing a sturdy, low-to-the-ground structure. This mechanical advantage is your key to unlocking the skill.
1.2. Why It's a Foundational Skill
While the One Arm Elbow Lever is technically miles away from a true One Arm Handstand, the principles it teaches are invaluable. You’ll learn to generate and maintain immense Full Body Tension, a non-negotiable component of all advanced skills. You’ll develop a deep, intuitive understanding of how to shift your weight and use your hands for control. Mastering this skill builds the raw strength, wrist resilience, and mental fortitude that carries over to more complex movements like the Planche or even the Crane Pose. Think of it as your first major exam in bodyweight mastery—pass it, and you'll have the Confidence and physical preparation to tackle much greater challenges.
2. Mastering the Core Technique
2.1. The Critical Hand Position
This is the single most overlooked—and most critical—detail. You must turn your supporting hand outwards. If you're balancing on your right hand, your fingers must point to your right side, with your thumb pointing towards your head. There are two non-negotiable reasons for this. First, this orientation is what allows you to balance. It gives you the leverage to make micro-corrections. Second, it protects your wrist. To hold the lever, your shoulders must lean significantly forward. If your hand were in a normal Push Up position, this lean would force your wrist into an extreme, painful angle, leading to Inflammation and injury. Proper hand position isn't a suggestion; it's a requirement for both success and safety.
2.2. Perfecting Elbow Placement
The better you place your elbow, the less work you have to do. Your goal is to wedge the point of your elbow as close to your midline as possible. Aim for the area directly in or just beside your belly button. The elbow acts as a fulcrum, and a centered fulcrum provides the most stable support. If you feel your shirt or skin sliding, it means your placement is off or your core isn't engaged tightly enough. You need to create a solid, locked-in connection. For extra grip, especially when you're starting, a bit of chalk on your abdomen and the skin of your triceps can make a world of difference.
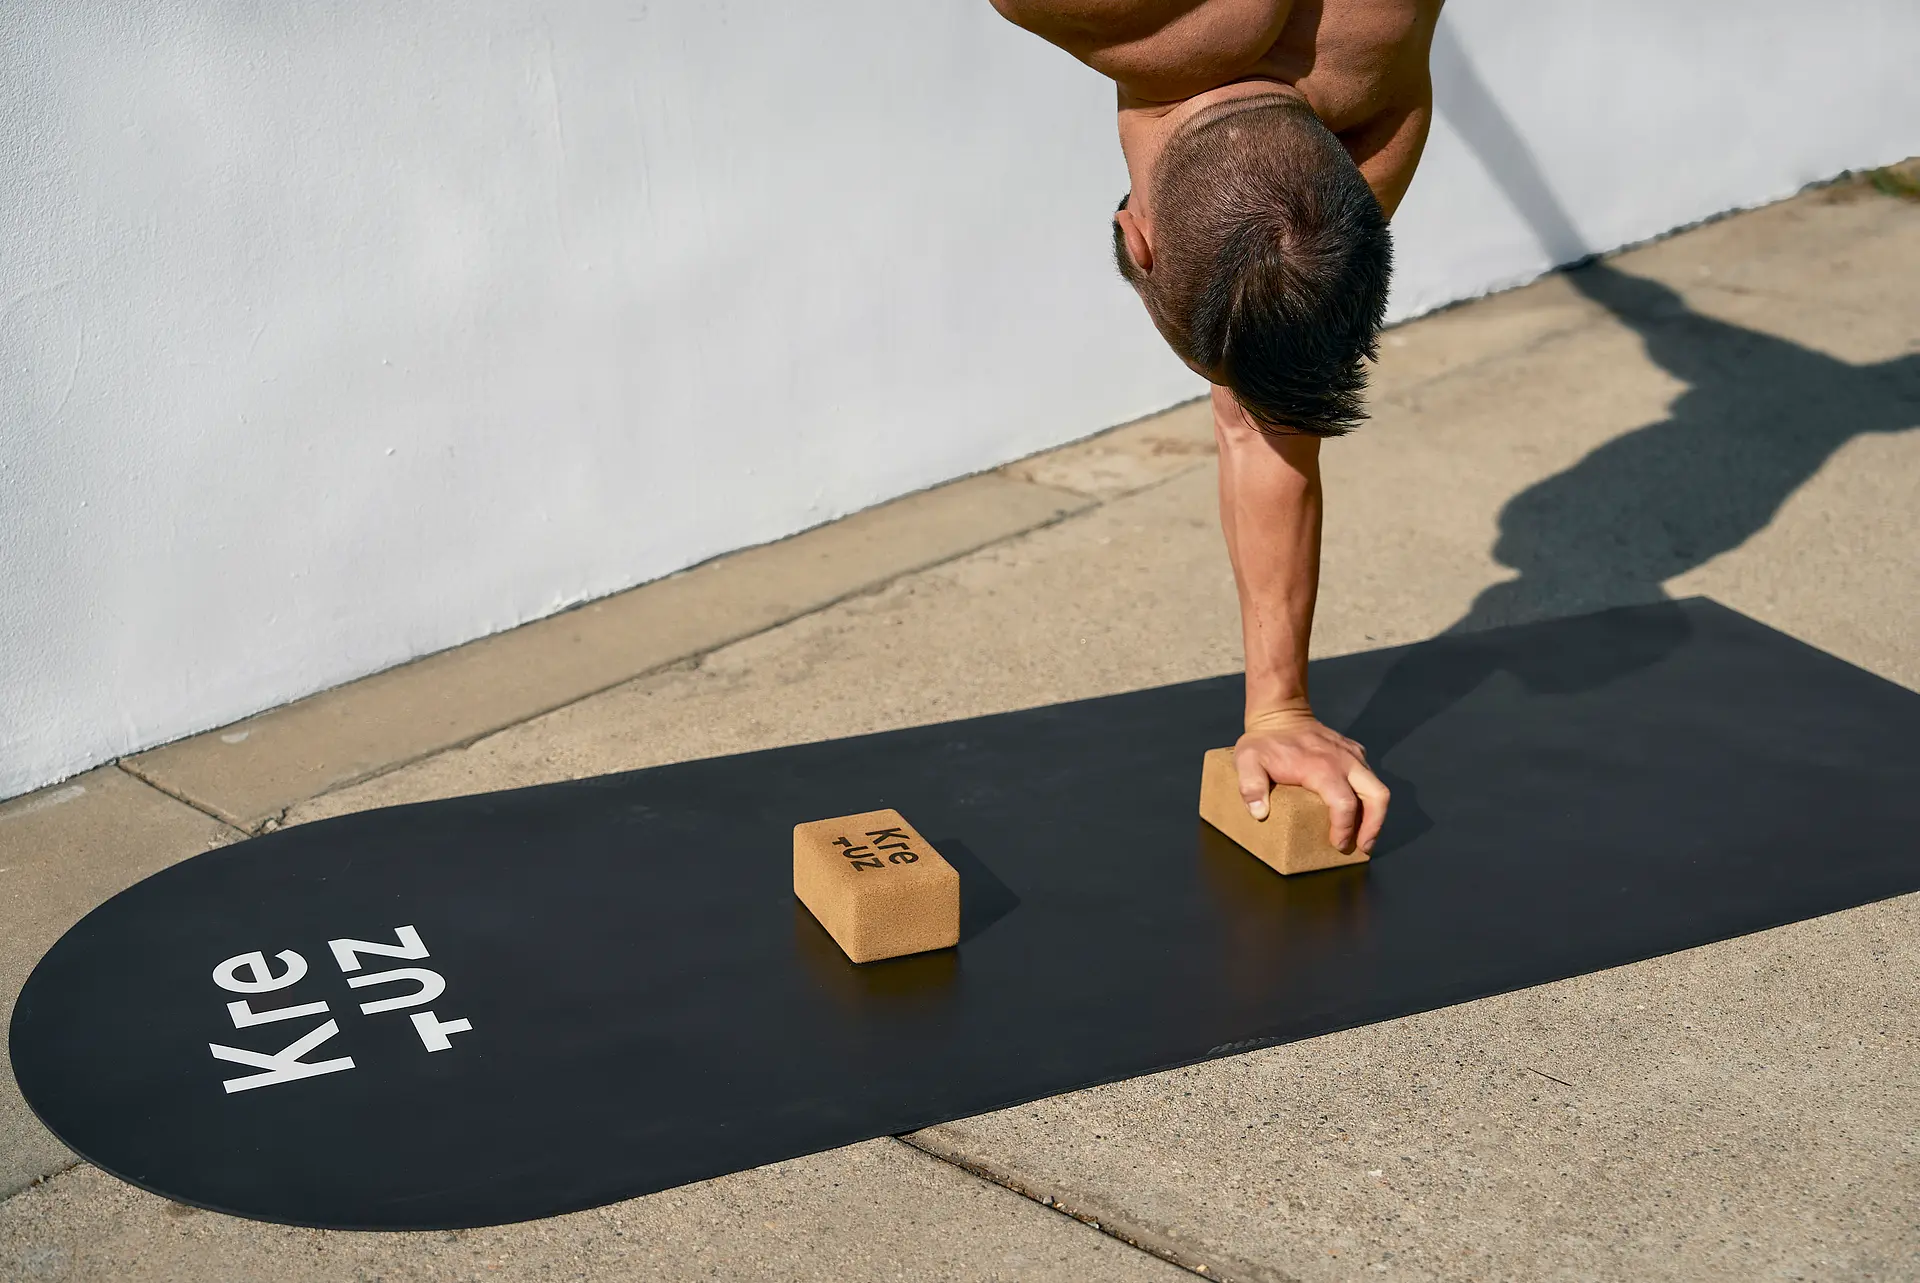
2.3. Fingertip Pressure is Control
This is a universal law of Hand Balance: control comes from the fingertips. As soon as you feel your weight sinking back towards the heel of your hand, you've lost the fight. Your body will start to flail, your free arm and legs thrashing to find a balance that's already gone. You must proactively lean into your hand and drive pressure into your fingertips. Spread your fingers wide to maximize your surface area. If you're training on blocks, grip them hard. Dominating your body's Alignment and Balance begins with what your fingers are doing. They are your steering wheel.
2.4. The Mandate of Full Body Tension
Let's be clear: while the One Arm Elbow Lever is a 'beginner' one-arm skill, it is not a passive position. You cannot simply chill and expect it to work. You must consciously engage your entire kinetic chain. Push the supporting hand into the floor. Fire up your lats and back muscles. Squeeze your glutes and tighten your legs until they are rigid spears. Straighten your free arm with purpose. If any part of your body is soft or sloppy, the lever will not only look terrible, but it will be impossible to hold. More importantly, this Full Body Tension is your insurance policy against injury. A lazy lever puts immense strain on your shoulder, back, and wrist joints. An engaged lever protects them. Injury Prevention is an active process, and it starts with tension.
3. Building Your Foundation: Strength & Preparation
3.1. Bulletproof Your Wrists
Your wrists were not designed to bear your full bodyweight, especially not on one hand at an extreme angle. Before every single training session, you must dedicate at least five minutes to a proper wrist warm-up. This is non-negotiable. Your warm-up should include:
- Activation: Drills like Wrist Curls against a resistance band to wake up the forearm muscles.
- Mobilization: Gentle, controlled movements like Wrist Push Ups on your knees to prepare the joint for load.
You cannot rush this process. Build Time Under Tension gradually. Before you even attempt the full One Arm Elbow Lever, you should be comfortable with prerequisite holds that build wrist strength, such as Push Up holds, Wall Handstands, and L-Handstand Shrugs. This gradual Progressive Overload allows your connective tissues to adapt and strengthen.
3.2. Develop Your Sense of Balance
Before you can balance the Crocodile, you must first understand what balancing on your hands feels like. Start with foundational skills that teach Proprioception and control.
- Frog Stand & Crow Pose: While biomechanically different from the lever, both of these skills teach you the fundamental concept of shifting your Center of Mass over your hands and using your fingers to correct.
- Two Arm Elbow Lever: This is the most direct precursor. It will teach you the specific feeling of balancing parallel to the floor on your elbows, but remember, the stability of two arms is a world away from the challenge of one.
3.3. Forge the Requisite Muscle
Beyond Balance and wrist resilience, you need raw Strength. The primary movers and stabilizers are your supporting arm and your entire posterior chain.
- Pushing Strength: Start with standard Push Ups. Once those are easy, progress to Lean Push Ups by walking your feet forward to increase the load on your shoulders. You can also practice a modified Archer Push Up, focusing on bringing the bent elbow towards your midline, mimicking the exact motor pattern of the lever.
- Back Strength: The classic Superman Lift, performed lying on your stomach, is perfect for preparing your back muscles. To increase the difficulty, you can perform them on a box or bench for a greater range of motion, or add light ankle and wrist weights for more resistance.
4. The Path to Mastery: Progressions & Training
4.1. The Supported Floor Crocodile
Most people fail at skills because they don't train—they just 'try'. We need a systematic, scalable plan. The ultimate and truly essential drill for the One Arm Elbow Lever is the block-assisted floor variation. Place your supporting hand on the floor, then elevate your feet and your free hand on yoga blocks. Start by simply holding this supported position, gradually increasing your hold times. This is your first step in building specific Time Under Tension and allowing your wrist, shoulder, and back to adapt.
Once you're comfortable, begin lifting one limb at a time off the blocks. This forces you to learn the subtle weight shifts required for Balance. This drill builds strength, enhances Coordination, and gives you direct feedback on your readiness. The final step in this progression is lifting both feet, or even one foot and the free arm, off the blocks simultaneously. If this feels impossible, you are not yet ready for the full, unsupported lever. Don't just tick the box on this drill; make it a staple in your routine. Train it twice a week for at least a month. The strength and control you build here are what will make the final skill possible.
4.2. The Elevated Hand Take-off
The final key to unlocking the full Crocodile is to practice with your supporting hand elevated on a handstand cane, a stack of books, or a sturdy table. Elevating the hand creates space between your body and the floor, making the take-off significantly easier. It allows you to hold a 'less-than-perfect' Crocodile, where your body might be slightly declined, before you have the strength to pull up past parallel. This is Progressive Overload in action. Over time, methodically decrease the height of the elevation, working your way down to the floor. Do not rush. Consistent, small gains are the secret to avoiding plateaus and injuries.
5. Overcoming Common Roadblocks
5.1. Managing Wrist Pain
Pain is a signal, not a badge of honor. Wrist pain is incredibly common when starting the One Arm Elbow Lever due to the high pressure at an awkward angle. The key is to manage it intelligently.
- Use a Declined Surface: Find a plank of wood, a book, or the edge of a carpet and prop one side up to create a slight decline. Place your supporting hand on this surface with your fingers pointing downhill. This will immediately decrease the angle of your wrist, reducing pressure and discomfort. Over time, slowly decrease the incline until you're back on a flat surface.
- Post-Workout Rituals: Treat your wrists like you treat your muscles. After a heavy session, apply Cold Therapy. Submerging your wrists in ice water for 8-12 minutes can drastically reduce Inflammation and discomfort. This is especially crucial while your joints are adapting to the new stress.
5.2. The Importance of Bilateral Training
This should be obvious, but it must be said: train both sides. You will naturally have a stronger, more coordinated side. It's tempting to make this your favorite side and neglect the other entirely. This is a massive mistake. Your training volume should be equal on both arms. Why? Firstly, one-sided training leads to uneven soreness, which is deeply uncomfortable. More critically, in the long term, it can lead to muscular imbalances and potentially even postural issues like scoliosis. Don't create problems for your future self. Train smart, train balanced.
6. Unleash Your Crocodile
Mastering the One Arm Elbow Lever is a journey of precision, patience, and intelligent effort. It’s not about brute force, but about understanding leverage and creating unwavering tension. The two most critical takeaways are perfecting your hand and elbow placement for a stable foundation, and using systematic progressions instead of mindless attempts. This approach doesn't just build the skill; it builds the discipline and Technique that will define your entire Calisthenics practice. This foundational one-arm balance will elevate your workouts and serve as a testament to your control. Now you have the blueprint.
Get to work.