Tuck Planche Progress: The Ultimate Measurement Guide
Stuck on your Tuck Planche? You're measuring progress all wrong. Here’s the system to see real gains.
TABLE OF CONTENTS
1. The Deception of Invisible Gains
1.1. Why Your Planche Progress Feels Stuck
Planche progress is a brutal, slow grind. It can feel deeply discouraging when you're pouring everything into your training but the mirror shows you the same struggling Tuck Planche week after week. Here's the hard truth: you are getting stronger. If an expert coach observed you once every month, they would see significant improvements. The problem is you're with yourself every single session. You're accumulating tiny, imperceptible micro-gains, but just like watching your hair grow, you're too close to see the change. This illusion of stagnation is one of the biggest killers of motivation in Calisthenics. Without a concrete way to measure progress, you're flying blind, relying on 'feel', which is the most unreliable metric in Strength training.
1.2. The Anatomy of a Plateau
The journey to mastering a Straight Arm Strength skill like the Planche is not just about building bigger muscles. It's a grueling process of Connective Tissue Adaptation, where your tendons and ligaments slowly become more resilient to immense forces. This anatomical process is painstakingly slow. When you combine this with the neural challenge of learning a new Movement Pattern, it's easy to hit a wall. A true plateau isn't a lack of effort; it's a lack of intelligent strategy. To break through, you need objective data, not just grit.
2. The Elevation Method: Your New Progress Metric
2.1. How to Measure What Matters
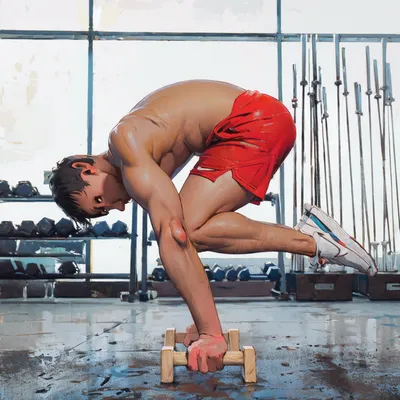
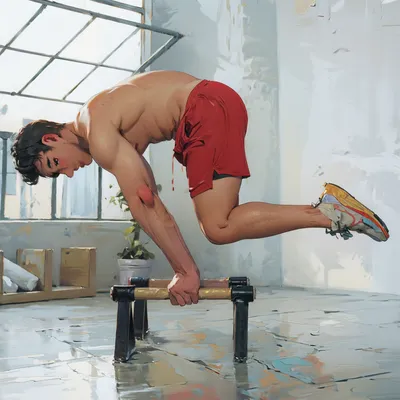
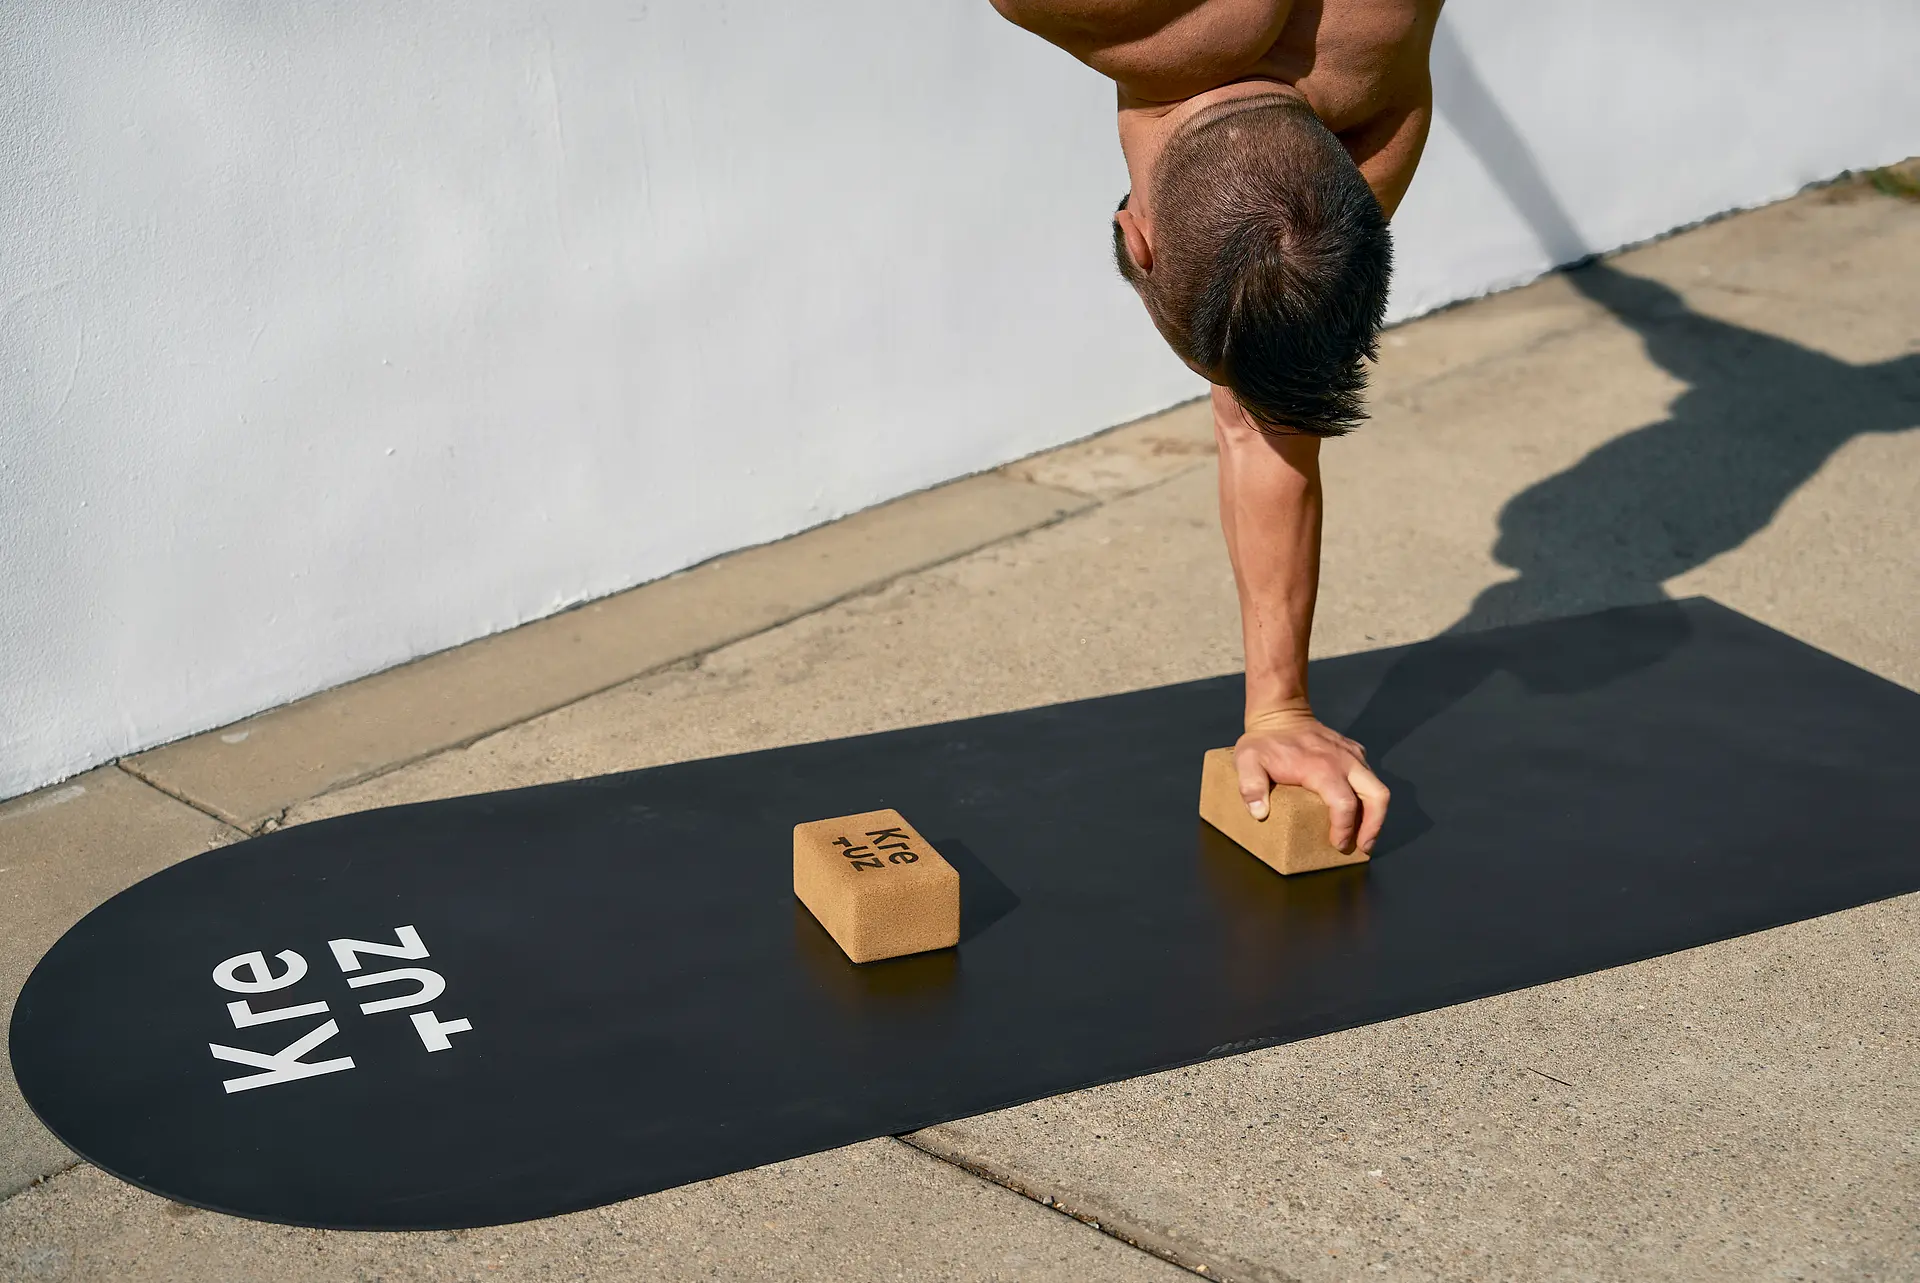
Stop guessing and start measuring. The most effective way to track and scale your Tuck Planche is by manipulating your environment. All you need are books, yoga blocks, or any stackable, stable objects to elevate your hands off the floor. The principle is simple: a higher elevation reduces the lean required and makes the hold easier. By systematically decreasing this elevation over time, you create a clear, quantifiable path of Progressive Overload. This isn't just a training tool; it's your new progress log. No more guessing if you're stronger—the height of your stack tells you the truth.
2.2. Implementing the System
Begin by stacking your blocks or books high enough that you can hold a solid Tuck Planche with perfect form for your target time. Perfect form is non-negotiable: locked elbows, engaged core, and most importantly, full Scapular Protraction creating a rounded upper back. Your goal is to own this height. Once you can consistently hit your time goals, the progression is simple: remove one layer. Take away a single book or flip a yoga block to its lower setting. This small, incremental increase in difficulty is precisely the stimulus your body needs to adapt. This method transforms your training from a frustrating guessing game into a calculated assault on your goals.
3. Advanced Scaling: Beyond the Basics
3.1. Increasing Compression and Intensity
Once you've worked your way down and can hold a solid Tuck Planche with your hands flat on the floor, the game isn't over. It's time to increase the intensity. Take those books or blocks you've conquered and place them underneath your knees. This forces a higher degree of hip Compression, pulling your knees tighter to your chest and lifting your legs higher. This variation dramatically increases the difficulty and is a direct bridge to the Advanced Tuck Planche. It specifically targets your hip flexors and deep core, forging the strength needed for more elite positions.
3.2. Manipulating Time and Form
Measurement isn't just about elevation. You can apply Progressive Overload by manipulating other variables. Once you're on the floor, focus on increasing your Time Under Tension. Add one second to your hold each session. Another advanced technique is the Tuck Planche Walk, where you slowly 'walk' your hands forward and backward while maintaining the hold. This challenges your Scapular Stability and control in a dynamic way. Remember, the goal is to consistently make the exercise harder. A challenge is a sign of change. Don't be afraid to combine methods—for example, performing Planche Leans on an elevated surface to build the foundational Shoulder Flexion Strength needed for the full skill.
4. Forge Your Path to Planche Mastery
4.1. From Measurement to Mastery
Stop being a victim of invisible progress. The elevation method gives you the objective feedback you've been missing. It provides a clear, logical, and motivating path forward. Your journey is no longer a random walk in the dark; it's a calculated climb, one book, one inch at a time. The principles are clear: measure your starting point, apply consistent and progressive overload, and be patient. The strength you are building in your muscles, joints, and tendons doesn't develop overnight. Trust the process and respect the timeline of your own anatomy.
4.2. Your Call to Action
Embrace this system. Log your elevation, track your hold times, and celebrate every small victory as you remove another layer between you and the floor. This is how you conquer the Planche. This is how you build undeniable strength. Stop hoping for progress and start manufacturing it. The blueprint is in your hands.
Get to work.