Handstand Wrist Pain: Your Ultimate Guide to Pain-Free Training
Wrist pain is killing your handstand progress. It's time to stop guessing and start training smart. Here’s how.
TABLE OF CONTENTS
1. Deconstructing Wrist Pain: The Why Behind The Ache
1.1. Know Your Enemy: The Root Causes of Wrist Pain
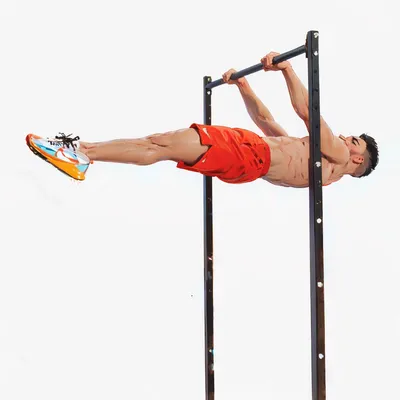
Let's cut straight to it. You love training Handstands, but your wrists are screaming. That pain—during, after, or even hours later—is a signal. It's not a badge of honor; it's a sign that something is fundamentally wrong in your approach. Pain is unnecessary, and it shouldn't be a part of your training. We all want to be upside down, but nobody should have to live with discomfort. In my entire journey as a professional hand balancer, acrobat, and coach, I have yet to find a single person who couldn't get rid of their wrist pain. The most common culprit is often a cocktail of poor Technique, excessive volume, and inadequate preparation. Your shoulders sink, the angle in your wrist sharpens, and you create a pressure cooker of Inflammation. This is the start of a vicious cycle: pressure leads to swelling, swelling creates more pressure, and pain distracts you, making your form even worse. But you can break this cycle. To train pain-free, you first need to understand why your wrists hurt.
1.2. The Two Wrist Archetypes: Stiff vs. Mobile
Self-analysis is the cornerstone of progress. To pinpoint what you need, you must first define what kind of wrists you have. In my experience, every athlete falls into one of two categories. Which one are you?
- The Stiff-Wristed Warrior: I have ultra-stiff wrists. So stiff that when I auditioned for circus school, they almost rejected me, convinced I'd never be able to Handstand. Twenty years later, it's safe to say I made it work. Stiff wrists aren't necessarily more prone to injury, but your first few handstands of the day will always feel like a battle. You must stretch and mobilize every single time before you get upside down. The upside? This stiffness provides a natural block, making it harder to fall over backwards. While mastering this takes years, it's a structural advantage that has made a colossal difference in my career.
- The Mobile Maverick: If you have flexible wrists, you might think you've won the genetic lottery. You can hit a 90-degree angle on the floor without a warm-up. But this is a double-edged sword. This ease often leads to complacency, causing you to skip warm-ups entirely and skyrocket your risk of injury. Flexible wrists are often weaker, leading to less stability in your Handstand. You're more likely to wobble, fall, or get small tweaks from “pushing through” the joint instead of supporting it with muscle.
1.3. Pre-Existing Conditions: Acknowledging Your History
Life is a long road, full of obstacles that leave their mark. These scars tell a story, but they also demand we adjust our training. Maybe you have wrist pain before even attempting your first Calisthenics skill. But you love being upside down, and you refuse to let an old injury dictate your future. Acceptance is the first step. You'll probably never be the athlete who rocks up to the gym and casually jumps on their hands. Neither will I. I've always been the one warming up the longest. That's not a weakness; it's a strategy. Work with your limitations, not against them. It’s okay to exclusively train on declined blocks or Parallettes. It’s okay to do only five handstands per session. The goal isn't to look cool; it's to build a sustainable, healthy practice fueled by passion.
2. The Pillars of Pain-Free Handbalancing
2.1. The Einstein Principle: If It Hurts, Change It
Einstein’s definition of insanity was doing the same thing over and over while expecting different results. If you train handstands and your wrists hurt, you must change your approach. It is that simple. You cannot ignore the problem and hope it magically disappears. It won't. Instead, you must build a smarter strategy.
2.2. Master Your Technique: The Shoulder is King
This is the big one. The most common reason for wrist pain is a catastrophic lack of Technique. Your shoulder push—or lack thereof—determines your wrist's health. When you sink into your shoulders and lose Scapular Elevation, your shoulders slide forward. This sharpens the wrist angle, placing immense pressure on the joint. This is a direct path to Inflammation and pain. You must break this habit. Focus relentlessly on pushing tall. The moment you feel yourself sinking, come down. Rest, reset, and go again. Building the habit of quality over quantity, especially early in your journey, is non-negotiable for injury prevention. A straight line achieved through proper Joint Stacking—wrists, elbows, shoulders, hips—is the most efficient and safest way to hold a Handstand.
2.3. Respect the Load: Progressive Overload for Your Wrists
This seems logical, but it’s a truth many ignore. Your hands and wrists were not designed to support your entire body weight. A lifetime of walking on your feet did not prepare them for this. So why do you expect them to handle the full load on day one? Just like any other form of strength training, you must apply Progressive Overload intelligently. Start slowly. Keep sessions short and train only 2-3 times per week. Over weeks and months, your ligaments and connective tissues will adapt, and the surrounding muscles will strengthen. Gradually increase your Time Under Tension. The slower and more consistent your volume increases, the better.
2.4. The Ground You Stand On Matters
Believe it or not, the surface you train on can make or break your wrists. Many aren't aware of this, which makes it crucial to address. Do not train on soft gym mats. I get it; the soft floor feels safe. It makes falling less intimidating. But it’s a trap. The softer the floor, the more your hand sinks, and the sharper the angle in your wrist becomes. Remember our rule? A sharp angle means more pressure, which means more Inflammation and pain. The solution is simple: train on a hard, solid floor. The soft surface also dampens the feedback from your hands, delaying your corrections and making it harder to balance. If you’re scared of the hard floor, place mats around you, not under you. Or, get creative. A shelf from a closet or a sturdy kitchen tray makes a perfect budget Handstand board.
3. The Daily Ritual: Preparation and Recovery
3.1. The Art of the Warm-Up: Activate and Mobilize
They say preparation is key, and they're right. Warming up your wrists before every single session isn't optional; it's your primary defense against Injury Prevention and the key to longevity. Because wrists are so individual, you have to learn what your body needs. If you have mobile wrists, your focus should be on activation—waking up the muscles in the forearms to stabilize the joint. If you're stiff like me, you need dynamic and static stretches to gently increase range of motion. But remember, a warm-up isn't just about the wrists. It’s a full-day job. Keep your hands, forearms, and shoulders warm all day. Avoid sitting in front of a fan or holding your hand out the car window. That cold air can make your joints feel brittle and dramatically increase your risk of pain later.
3.2. Wrist Conditioning: Strength, Not Soreness
Everyone talks about strengthening wrists, but let's be clear: there are very few muscles in the wrist itself. What we're actually strengthening are the forearm muscles that control it. My favorite exercise is the overhead wrist curl against an elastic band. This precisely targets the muscles you use for Fingertip Control in a Handstand. But here’s the crucial caveat: do not overdo it. Conditioning should not be done to the point of fatigue right before your handstand session. Fatigued forearms will lead to poor form, increased pressure on the wrist, and a higher risk of injury. I recommend doing minimal direct wrist conditioning. Allow your wrists to get stronger naturally by gradually increasing your handstand volume.
3.3. The Cool-Down: Your Investment in Tomorrow's Session
We've all been there. You've put in the work, you're sweaty, hungry, and ready to go home. The cool-down is the first thing to get skipped. Do it once or twice, and you'll probably get away with it. But make it a habit, and you're setting yourself up for chronic soreness and injury. Your muscles need time to relax and recover. Tight forearms and shoulders pull on your joints, restricting Mobility and causing pain. Finish every single session with 5-10 minutes of gentle wrist and shoulder stretches. It’s a small price to pay for how much better you'll feel tomorrow.
4. When Pain Strikes: Your Immediate Action Plan
4.1. First, Be a Detective: Are You Injured?
It’s bound to happen. If you're serious about handstands, at some point, your wrists will hurt. Understanding how to react is key. The very first step is to figure out if you're actually injured. Are there visual signs like acute swelling or bruising? If so, it’s time to see a professional. If not, take it easy. Rest for 3 days. If the pain doesn't improve or gets worse, you are likely injured. Don't guess. Get it checked out. Better safe than sorry.
4.2. The Volume Dial: Turn It Down
If training is causing you pain, the solution is brutally simple: train less. Give your body a chance to heal and for the Inflammation to subside. Continuing to push on an angry wrist will only make things worse. I'm not saying do nothing. Cut your handstand volume down to 20%. Use the 80% of time you just freed up to work on your hamstring Flexibility, L-Sit Compression, or cardio. The list of productive things you can do is endless.
4.3. My Secret Weapon: Strategic Cold Therapy
This one trick honestly saved my career as a hand balancer. I was in NYC, doing 10 shows a week with Cirque du Soleil, performing late-night gigs, and filming for our exercise library. My body was completely overloaded, and my wrists were screaming. A friend taught me this, and it was a game-changer. Ice therapy. Fill a bucket with ice and water, and submerge your hands for 8-12 minutes. Do it once right after training and a second time right before bed. While there are conflicting opinions on Cold Therapy, my clients, my fellow performers, and I swear by it. Crucial rule: DO NOT EVER ice before training. Allow at least 4-8 hours of recovery after icing before your next session. If 12 minutes straight is too much, try contrast baths: 30 seconds in ice water, 30 seconds in hot water. It works wonders.
4.4. The Wrist Wrap Debate: Crutch or Cure?
Do wrist wraps help with wrist pain? Yes and no. There is one specific medical condition where they are genuinely beneficial. Chances are, you don't have it. However, many athletes swear by them, and I believe it's the placebo effect that truly helps. If you believe something helps, it often will. The ritual of putting on wrist wraps can get you into the right mindset, changing your muscle engagement. The moral of the story? Try them. If they feel supportive and you like them, use them. If you find them uncomfortable, leave them in your bag. And don't worry about them hindering muscle growth—no wrap offers that much support. You're overthinking it.
5. The Handstander's Toolkit: Beyond the Floor
5.1. The Power of Parallettes
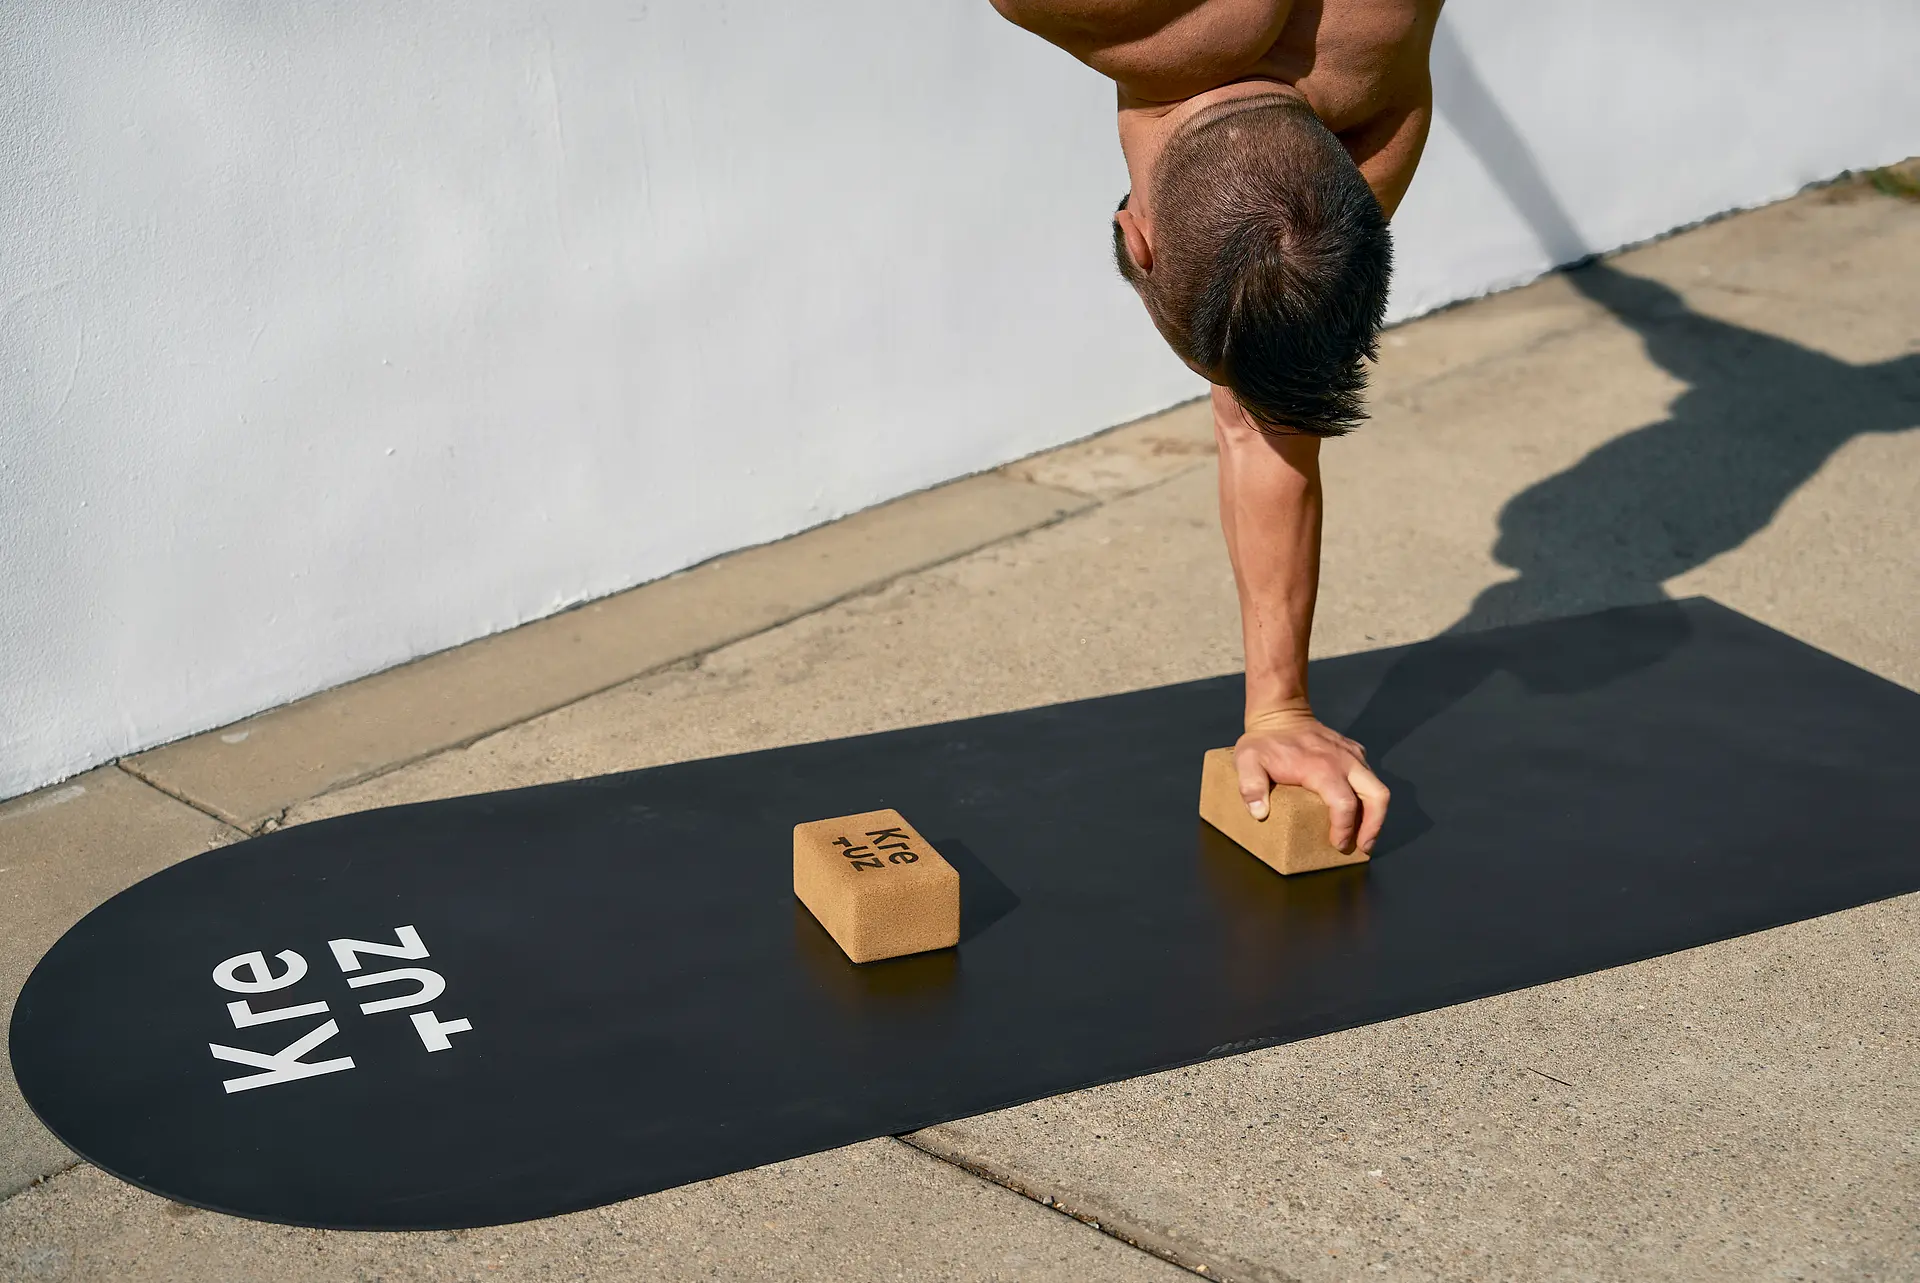
There will be times when your wrists simply can't take the load of floor work. You're hurt, you're beat, but you still want to train. It's easy to feel like giving up, but you're in luck. I've been there many times, and there are always solutions. The first is to do it like the gymnasts do: use Parallettes. They drastically reduce the stress on your wrists by keeping them in a neutral position, eliminating the sharp hyperextension angle. This works for almost all handstand-related wrist injuries. In fact, I recommend training all high-impact conditioning like Handstand Push Ups, Presses, and Planche work on Parallettes to minimize long-term wear and tear. Just be aware that the balance and shoulder engagement is different. Reduce your volume accordingly and adapt slowly.
5.2. The Strategic Decline
For mild wrist pain or Inflammation, you can often continue your normal training with a simple modification. Use a board or handstand blocks to create a slight decline. The more you decline the surface, the less sharp your wrist angle becomes, reducing pressure and inflammation risk. A declined surface is a powerful tool to help you continue training while recovering, or to manage volume when you're pushing harder than usual. However, I wouldn't make this a permanent habit. If you always train on a decline, you have nowhere to go when an injury does flare up. Use it as a strategic tool in your training arsenal, not a permanent crutch.
5.3. An Injury is an Opportunity
When I was 12, I faked a back injury to get out of tumbling in gymnastics. My grumpy, stubborn coaches—who I'm now incredibly grateful for—told me to stop tumbling and work on prehab, conditioning, and handstands instead. While everyone else was pushing big stunts, I was forced to master the basics. In the long run, this allowed me to outperform many of them. The moral of the story: an injury can be a profound opportunity. Take a step back from high-impact handstands and focus on your core, your Flexibility, your lines. When your wrist is fully recovered, you’ll return to your training and realize everything feels significantly easier than before.
6. Forge Resilient Wrists, Master Your Handstand
If you're serious about handstands, you're about to get to know your wrists on an intimate level. You will go through ups and downs, deal with all sorts of issues, and experience surprising periods of pain-free progress. Above all, you will learn to understand your body better than almost anyone else. This deep awareness—learning to listen to the subtle signals and manipulate your body's reactions—is the ultimate key to consistent training, long-term gains, and doing what you love for a lifetime. Your wrists are not a liability; they are a sophisticated guidance system. Learn their language, respect their limits, and build them into a resilient foundation for your practice.
Get to work.