Fix Your Wall Handstand: Strength vs. Mobility
Is your wall handstand stuck? We reveal the two biggest reasons and how to fix them for good.
TABLE OF CONTENTS
1. Deconstructing the Chest to Wall Handstand
1.1. What It Is and Why It Matters
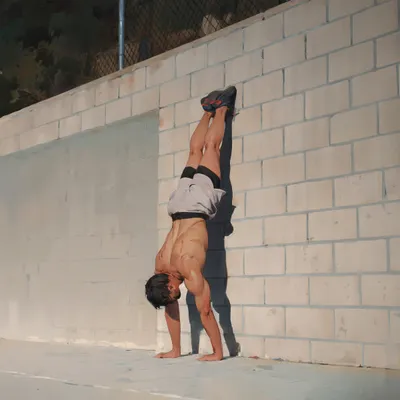
The Chest to Wall Handstand marks one of the first big milestones on every beginner's path. It is your first true taste of a vertically aligned inversion. Walking your feet up the wall and inching your hands closer is undeniably challenging, maybe even intimidating at first. But let's be clear: with focused practice and the right cues, anyone can master this fundamental position. The original intro text mentioned that pretty much anybody starting out with Wall Walks is struggling with one of two problems. This is true, and we will dissect them. This drill is more than just an entry point; it's a diagnostic tool. At the beginning of your journey, it's the highlight of your session. With time, it evolves into a potent warm-up or a highly efficient conditioning drill for your Core Stability, arms, and Scapular Elevation Strength. Getting this right sets the stage for everything that follows, from the Freestanding Handstand to the Handstand Push Up.
1.2. The Non-Negotiables of Form
Success here isn't about luck; it's about precision. The standard is non-negotiable: only your feet should touch the wall. Your elbows must stay locked, demonstrating true Straight Arm Strength. Your shoulders must cover your ears at all times—this is the visual cue for proper Scapular Elevation. Move slowly and deliberately. Use the wall as a guide, not a crutch. If your feet peel off in a sloppy attempt to find Balance, your form is broken. You are not training a Freestanding Handstand; you are training a perfect, stable, wall-supported line. This is a drill of Alignment and Control, not a circus trick. Treat it with the respect it deserves, and it will reward you with a powerful foundation.
2. Limiting Point #1: The Strength Deficit
2.1. Recognizing a Lack of Power
Do you find yourself hesitating? Does the fear of collapsing face-first onto the floor creep into your mind as you walk your hands toward the wall? If you're constantly worried that you might just collapse, this is your sign. It isn't a lack of courage—it's a lack of Strength. This fear is a physical signal that your structure is not yet prepared for the load. Before you push further and risk Overuse injuries, we need to pause and build the engine. We must reinforce the arms, shoulders, and core to ensure proper Technique, build structural integrity, and forge the Confidence needed to dominate more advanced drills.
2.2. Forging Foundational Strength
The beauty of Strength training is that it's a solved problem. The principles are proven. Start by committing to two focused sessions per week. Your arsenal should include exercises that build raw Upper Body Pushing Strength like Push Up progressions and Pike Push Ups. Sharpen your Scapular Control with Scapular Push Ups, and maintain balance with pulling work like inverted rows. These sessions don't need to be long—20 minutes, excluding warm-ups and cool-downs, is all it takes. Combine this with adequate Recovery and proper nutrition, and you will feel a significant difference within four weeks. When you return to the wall, you won't be hoping to hold the position; you will command it. Your muscular resistance will grow in tandem with your technical skill, preparing you for the demands of the Freestanding Handstand.
3. Limiting Point #2: The Mobility Wall
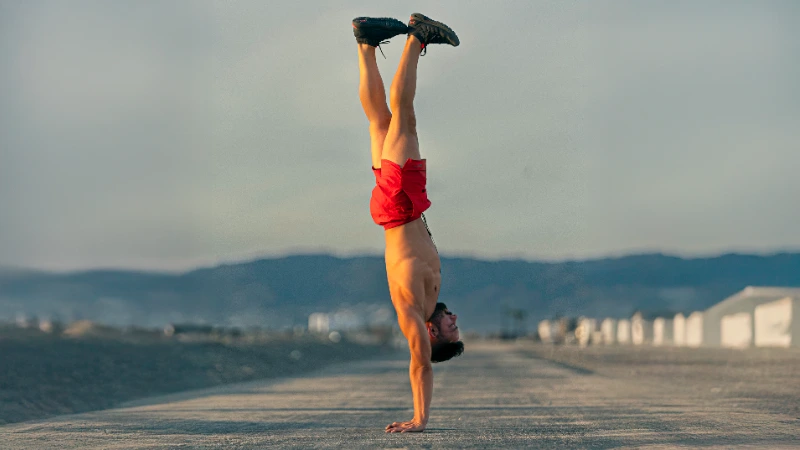
3.1. Are Your Shoulders Holding You Hostage?
What if you have the strength, but you simply cannot get your body into a straight line? If your handstand looks more like an arch than a pillar, the culprit is almost always tight shoulders and limited Mobility. This is a different battle, requiring a different strategy. Your goal now is to open the shoulders to create an efficient, stacked Handstand line. We need to dismantle a common myth: this isn't about simply forcing the shoulders open into extension. The real key is to stretch the lats to achieve powerful Scapular Elevation. Without this, a straight line is a biomechanical impossibility, leading to the infamous Banana Handstand.
3.2. The Path to Scapular Freedom
To achieve true overhead Mobility, we need a two-pronged attack. First, we must stretch the lats and surrounding muscles to improve Shoulder Flexion. Second, and more importantly, we need to build specific Strength and Coordination in that newly acquired range. Traditional passive stretches have their place, but relying on them alone will take ages. Your progress will accelerate dramatically when you focus on Active Flexibility drills. My experience with hundreds of clients shows that developing these small, specific muscles for Scapular Elevation takes between 10-14 weeks of consistent work. The investment is worth it. I recommend continuing your handstand practice as usual, but add a 10-minute, scapula-focused block to the start of every workout. Dedicate 80% of this time to active opening and awareness drills, and 20% to passive stretches. This is how you turn a limiting point into a powerful asset.
4. Your Blueprint for a Perfect Wall Handstand
4.1. From Weakness to Weapon
Learning to Handstand is a journey of self-discovery. It is about systematically identifying your personal limiting points and attacking them until they become strengths. The fact that you are reading this proves you are on the right path. Understanding your weaknesses early on is the key to efficient, specific training. Whether it's a Strength deficit or a Mobility wall, you now have the knowledge to create a training routine that ensures nothing holds you back. You have the blueprint. You know the mission.
4.2. Your Next Move
Stop guessing and start training with intent. Analyze your own Chest to Wall Handstand. Are you held back by fear and instability, or by a physical barrier in your shoulders? Be honest with yourself. Once you have your answer, you can dedicate your energy to the correct protocols. Build the raw power or forge the specific mobility you need. This targeted approach is the difference between stagnation and rapid progress. Turn your analysis into action. Turn your weakness into a weapon.
Get to work.