How to Press to Handstand: The Definitive Guide
Stop muscling your way up. The real key to the Press to Handstand isn't what you think. Let's fly.
Free customized Press to Handstand Workout:
TABLE OF CONTENTS
1. The Press to Handstand: More Than Just Strength
1.1. Defining the Mission: The Straight Arm Straddle Press
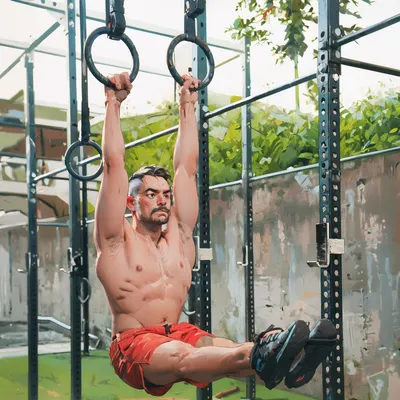
The Press to Handstand is an icon. A benchmark of control in calisthenics, yoga, and gymnastics. It’s not just an elegant way to enter a Handstand; it's a testament to an athlete's command over their body, a fusion of raw power and refined Technique. But before we dive in, let's be clear. The Press comes in many forms: bent arm, straight arm, legs together, from a Stalder Press. While the principles here apply broadly, our mission today is singular and precise: the standing, straight-arm, straddle Press to Handstand. This is the classic expression of the skill, and we are going to dissect it piece by piece.
1.2. The Great Debate: Strength vs. Flexibility
Let's settle this now. What is the true key to the press? Is it brute strength or deep flexibility? Consider two archetypes. In one corner, the CrossFit athlete: powerful, explosive, but often stiff. In the other, the advanced Yogi: incredibly flexible, but perhaps lacking the same raw Overhead Pushing Strength. Who presses first? The CrossFit gym likely has zero athletes who can press. The yoga studio, however, will have practitioners who can press almost by accident, without specific training. The evidence is clear. The Press to Handstand is not a feat of strength you muscle through; it is a skill unlocked primarily by Flexibility. Strength is the lock, but flexibility is the key. You need both, but one opens the door. Your path is determined by which you lack more. The strongest yogi and the most flexible CrossFitter will get their press first because they have the shortest distance to travel to bridge their respective gaps. If you are strong but can barely touch your toes, your primary work is unlocking your Hamstrings, hips, and shoulders. This isn't just about the press; it's about your quality of life. Tying your shoes will become easier. Your body will move better as you age. If you are hypermobile—your pancake is flat and your forward fold is effortless—your journey is about building strength and, more importantly, learning to control your range. You have to build the structural integrity to manage your incredible Mobility.
2. Engineer Your Press: Deconstructing the Movement
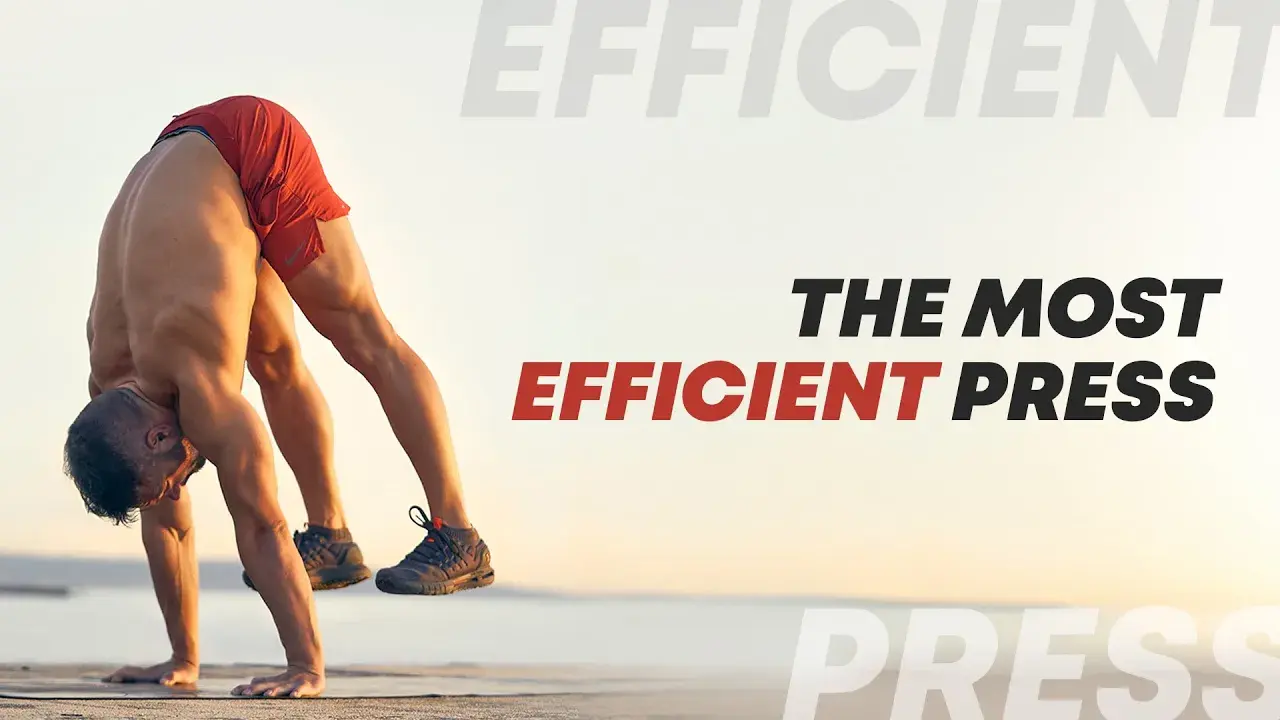
2.1. The Blueprint: The Three Phases of Flight
A successful press is not one big, explosive movement. It is a sequence of three distinct, controlled phases: the takeoff, the Compression, and the unrolling. Mastering the separation between these parts is what transforms a struggle into an efficient, repeatable skill. The goal is locked arms and hips parallel to the floor. Bending your arms or kicking a leg up first is cheating the movement. A true press is clean, controlled, and quiet. If you have to lean your shoulders excessively far forward, you are compensating for a lack of Compression and turning the press into a Planche. That's a different skill. Our goal is efficiency, not brute force.
2.2. Phase 1: The Takeoff
Your feet must leave the floor. This begins with a forward Weight Shift of the shoulders. Push through your index fingers, elevate through the scapula, and your feet will become light. The hips rise, and the feet lift. Hand position is critical: shoulder-width apart. Your starting stance matters. The closer your feet are to your hands, the shorter the distance to weightlessness. A narrow stance is non-negotiable. If you are flexible enough, bring the feet in closer. Initially, your lack of hamstring Mobility and Coordination will force a significant shoulder lean, which can be brutal on the wrists. If you feel pain or Inflammation, turn your hands out or use parallettes. Don't be a hero; train smart. Your primary drills here are targeted hamstring stretches to improve your starting position and exercises like Walking Deads to build specific shoulder strength and Proprioception.
2.3. Phase 2: The Compression
This is the make-or-break moment. After the takeoff, you enter the compression period. This is where we separate the technicians from the musclers. The goal is to push the hips vertically while simultaneously pulling the shoulders back to stack over the hands. But there's a catch: your shoulders are counterbalancing your legs. As you pull your shoulders back, you must actively pull your feet in and up towards your hands. This is the essence of Compression. A common error is to immediately open the legs into a wide straddle, blending all three phases into one sloppy mess. Separation is key. Keep the legs narrow until this phase is complete. This demands a symphony of Coordination, hamstring Mobility, hip flexor strength, and shoulder stability. You are only as strong as your weakest link. Lacking in one means you lack in all. To improve, you need both Passive Flexibility and Active Flexibility in the Hamstrings. Drills like the Bench Zombie are essential for building this specific Coordination. For raw compression power, nothing beats Hanging Leg Lifts and Sitting Leg Lifts. In every rep, your knees must be locked.
2.4. Phase 3: The Unroll
If you executed the first two phases with precision, this part is your reward. It should feel almost effortless. With your hands, shoulders, and hips already stacked, you simply unroll. Open the legs into your widest, most active straddle and guide them around and up into your Handstand. You can even pause halfway in a Straddle Handstand. Your Flexibility dictates the ease of this movement. A deep Pancake and Middle Split create a massive Mechanical Advantage. To groove this pattern, use the Back to Wall Press. Focus on keeping your lower back connected to the wall as you lower your legs. Do not let the back of your head touch the wall; this engages the wrong muscles and builds bad habits. Lock your knees. Always.
3. The Secret Weapon: Mastering the Negative
3.1. Reverse-Engineering Success
To go up, you must first master coming down. When you're just starting, pressing up feels impossible. The secret is to reverse-engineer the movement with slow negatives. Start in a Handstand and lower down with absolute control. Begin by only training Phase 3. From your Handstand, slowly lower your feet to a box or table, keeping your body line perfectly straight. Once that is mastered, add Phase 2 in reverse. Pull the feet down as far as you can with maximum Compression before you allow your shoulders to lean forward. Squeeze another inch lower. Then, and only then, lean the shoulders forward to complete the movement, touching the floor with the lightness of a feather.
3.2. The Sticking Point is the Sweet Spot
Your goal is total control. You want to touch the floor with just the nail of your big toe and hold it. This won't happen at first. At some point during the negative, you will feel control slipping away. That is your sticking point. That is where the real work begins. Do not think about lowering anymore. Freeze. Resist gravity with everything you have. Hold that position. This is how you forge the specific strength that will eventually power you back up. Gravity will do the rest, don't worry. The fight is the training.
4. Programming Your Ascent
4.1. Dedicated Assault vs. Split Ops
How do you fit this into an already packed training schedule? You have two primary strategies. The Dedicated Assault: 2-3 times per week, you run a full press-focused session. A thorough warm-up, Handstand balance work, 30 minutes of dedicated hip and hamstring stretching, then your press drills. These sessions are long, but brutally effective. The Split Ops: You break the press down into its components and train them on different days, which is ideal if you lack the time or energy for longer sessions. One day focuses on Handstand technique and negatives (Phase 3). Another session, perhaps after a gym workout or yoga class, is for your press conditioning—drills like Walking Deads, Planche Leans, or Bench Zombies (Phase 1 & 2). And your flexibility work can be its own session, 3-4 times a week, targeting your specific limiters.
4.2. The Non-Negotiables
No matter your strategy, some rules are absolute. Always warm up thoroughly, especially your wrists and shoulders. The pressure on your joints is immense. Prehab is not optional; it's mandatory for longevity and Injury Prevention. Always stretch before you press. The more mobile you are, the easier the press will be. It's a simple equation. If your session involves any inversion work (Phase 3), you must include a few warm-up handstands to dial in your Upside Down Awareness and Body Awareness. Do not skip the fundamentals.
5. Forge Your Press: The Path Forward
The Press to Handstand is one of the most coveted skills for a reason. The journey to achieve it forces you to become a more complete athlete. It demands you reconcile the paradox of strength and flexibility, and it teaches you the discipline of deconstructing a complex skill into manageable parts. Remember the two most critical takeaways: your progress is dictated by your greatest weakness, whether that's strength or flexibility, and mastery is found not in muscling through, but in perfect, controlled execution of each phase. The gains you make here—the Scapular Control, the Compression strength, the Mobility—will bleed into every other aspect of your training.
This is a long road. But if there was ever a skill worth a lifetime of training, even without ever getting it, this is the one. The process itself will forge you into a stronger, more capable athlete.
Get to work.