The Box Tuck: Unlock Your Freestanding Handstand Faster
Still stuck at the wall? The Box Tuck is the secret weapon for unlocking a powerful, aligned handstand.
TABLE OF CONTENTS
1. Unlocking the Handstand: Why the Box Tuck Reigns Supreme
1.1. The Direct Path to a Freestanding Handstand
Many roads lead to Rome, but some are undeniably faster. When the freestanding handstand is your Rome, the Box Tuck is the high-speed rail. Forget endless, frustrating hours against the wall. This single progression is a masterclass in Alignment, Control, Upside Down Awareness, and raw Strength. If you're chasing your first hold or perfecting your Tuck Handstand, you've just found the missing piece. While placing your limbs on a box might not sound revolutionary, the specific Technique we're about to dissect absolutely is. It forces you to build the correct motor patterns from day one, setting you on the most efficient path to success.
1.2. Advantage Over the Wall
The single greatest advantage of the Box Tuck Handstand over a Chest to Wall Handstand is the direction of force. At the wall, pressure on your shoulders remains horizontal, which is physically demanding but doesn't mimic the reality of balancing. The Box Tuck forces your Center of Mass to stack vertically over your hands, just like a real Freestanding Handstand. You might think harder is always better, but when you're learning the subtleties of form and Fingertip Control, simplicity is king. This progression makes the complex task of balancing easier, allowing you to focus on what truly matters: perfect Alignment.
1.3. Knees vs. Feet: The Ultimate Simplifier
To take it a step further, placing your knees on the box instead of your feet is a masterstroke of simplification. This simple adjustment reduces the weight on your hands significantly, freeing up mental and physical resources to dial in your form. By bending the knees, you keep your Center of Mass incredibly close to your hands, creating the ideal environment to achieve your first static holds. It's a progression that strips away the noise and lets you train the signal—the pure sensation of a perfectly stacked, controlled Handstand.
2. Mastering the Box Tuck: The Execution
2.1. The Setup: Foundation is Everything
The Box Tuck is a beginner-friendly drill that pays dividends at all levels, but only if you execute it with precision. If you don't understand the mechanics, you're just putting your knees on a box; you're not training. The Box Tuck is a foundational exercise for building Alignment, Control, Upside Down Awareness, and Strength. For advanced athletes, it’s a direct tool to forge a deeper, more controlled Tuck Handstand.
2.2. How to Perform the Box Tuck
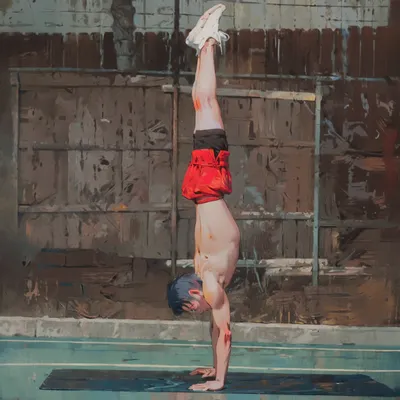
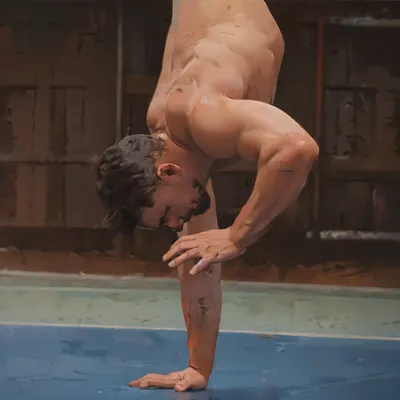
Find a high box, a sturdy kitchen counter, or a table. You may need to stack yoga blocks or books to get the height just right. Place the very edge of your knees on the surface and walk your hands in. In the starting position, your shoulders must be stacked directly over the center of your hands. Your glutes will stick out slightly, with your hips in a gentle Anterior Pelvic Tilt. Lock your elbows, elevate your scapula as high as possible (Scapular Elevation), and keep your gaze fixed on your hands. Your knees should be touching and fully bent, with heels pulled close to your glutes. This slight arch in the lower back is non-negotiable. If your hips collapse into a Posterior Pelvic Tilt, future progressions become impossible. This is why the box height is critical—if it's too low, you're wasting your time.
3. Progressions: From Support to Freestanding
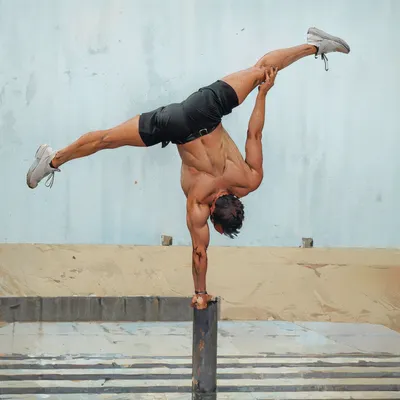
3.1. Single Leg Isolation
From that pristine starting position, your only limit is your creativity. But to get you started, here are the most effective progressions. First, the Single Leg Isolation. Extend one leg straight up toward the ceiling while the other remains fully bent and on the box. The mission is to align the top foot, hip, shoulder, and hand in a perfectly vertical line. Once aligned, push even taller through the shoulders. This drill teaches you how to manage the weight of a single limb while maintaining a solid structure.
3.2. The Leg Hover: Your First Taste of Freedom
Once you master the Single Leg Isolation, the Leg Hover is the logical next step. If you did step one correctly, this should feel almost effortless. The key is to not jump or swing. If your Alignment is perfect and your shoulders are in maximum Scapular Elevation, the second knee will peel off the box by itself. If you feel stuck, it’s a clear signal that your alignment is off. Film yourself from the side—it’s an unforgiving but brilliant coach.
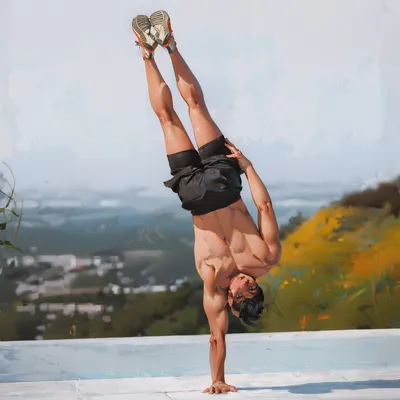
3.3. Full Leg Isolation and the Tuck Take-Off
Once the hovers are solid, it's time to extend that second leg all the way up into a full Freestanding Handstand. Do this with Control, and you've achieved the goal. Remember, slow is smooth, and smooth is fast. You don't have to go all the way up immediately. Even going halfway while maintaining that perfect top foot-hip-shoulder-hand line is a massive win. For advanced athletes, the true test is the Tuck Take Off. This involves either lowering from a Handstand to touch both knees to the box simultaneously, or lifting both knees off the box at once without any shoulder lean. Both variations demand incredible levels of Control and Strength in the shoulders and back.
4. Common Mistakes: The Devil in the Details
4.1. The Momentum Trap
Knowing the common pitfalls is your shortcut to faster progress. The most common error for beginners is using momentum. When trying to lift the second leg, they jump off the box. I understand the excitement, but this is a trap. It leads directly to a Banana Handstand. If you can't lift the second leg off slowly, your Alignment is wrong. This isn't a failure; it's feedback. Film yourself, analyze, and fix the root cause.
4.2. Hand Placement and Hip Engagement
Two other frequent mistakes are placing the hands too far from the box or resting the quads on the box instead of the knees. The correct hand position will feel intimidatingly close at first, but it is essential for proper Joint Stacking. Another critical error is letting the hips drop. As you lift a leg, your back must fire up to stabilize the hips. If you don't keep your weight in your fingertips and commit to the position, your hips will fall into a Posterior Pelvic Tilt, and you'll collapse back onto the box. You must learn to engage your back to support the weight of your legs.
4.3. The Banana Back Nemesis
Ah, the Banana Handstand—the nemesis of every aspiring hand-balancer. While the Box Tuck is designed to combat this, it's still possible to sink into the shoulders and arch the back. The box provides immediate feedback; if you arch, your ribs will touch it. Consciously push your knees into the box to offload some weight, and relentlessly focus on pushing tall through your scapula. Stay mindful of that Scapular Elevation in every single set. Over time, even the most stubborn banana will straighten out.
5. Forge Your Handstand
5.1. The Path is Clear
The Box Tuck isn't just another drill; it's a diagnostic tool and a direct line to a high-quality Freestanding Handstand. The list of benefits is almost endless, yet it remains a criminally underused progression. The primary reason? It requires a more thoughtful setup than simply kicking up against a wall. It demands that you find the right surface and the right height. This isn't a bug; it's a feature. It forces you to be intentional about your training. It builds Discipline.
5.2. Your Action Plan
Stop the endless, mindless reps against the wall that build strength but not skill. The box tuck provides the perfect bridge, allowing you to build Strength, Coordination, and confidence simultaneously. It forces you into good habits from the start by making a Banana Handstand physically awkward. It drastically improves your Tuck Handstand by forcing true hip flexor engagement. And it builds the confidence you need by providing a safe environment to explore being upside down. Find your box, perfect your setup, and integrate this progression into your routine consistently. The path is laid out for you. Get to work.